
4C303AE1-1C42-48E5-974E-4AB613CFDD0A

How to Read Your ICBC Road Test Results

Receiving your ICBC road test results can be exciting, disappointing or sometimes confusing. Whether you passed or failed, the result sheet contains valuable feedback about your driving skills and the areas that may still need improvement.

The check marks and handwritten notes are not simply a score. They show what the examiner observed during your road test, including your observation habits, space margins, speed control, steering and communication with other road users. Understanding this feedback can help you become a safer and more confident driver.

Is the ICBC Road Test Result Sheet a Simple Scorecard?

The ICBC road test result sheet should not be read like a school exam in which every check mark has the same value. Some mistakes are relatively minor, while others may create an immediate safety risk or lead to a traffic violation.

The examiner considers your overall driving performance, how often a mistake occurs and how serious it is. This means two drivers may receive a similar number of marks but have different final results.

What Does a Checked Box Mean?

A checked box identifies a skill or behaviour that needs attention. It does not necessarily mean that one particular mistake caused you to fail.

Repeated errors may show that a driving habit has not yet become consistent. A single serious action—such as speeding in a school or playground zone, creating a dangerous situation or requiring the examiner to intervene—may also affect the final result.

The handwritten notes are especially useful because they often explain the situation more clearly. Read them together with the checked boxes to understand what happened during the test.

The Five Main Driving Skills

The feedback section is divided into five main categories:

1. Observation

This includes shoulder checks, scanning, mirror checks, 360-degree checks, direction of travel, backing and hazard perception. Good observation means noticing potential risks early and checking properly before moving or changing direction.

2. Space Margin

This category covers lane position, following distance, stopping position, safe gaps, turns, parking margins and your position around other vehicles, cyclists and pedestrians. Maintaining enough space gives you more time to react safely.

3. Speed

The examiner looks at speed maintenance, rolling stops, amber lights, acceleration, deceleration and whether you follow posted speed limits. Drivers must also recognize when the limit changes, especially near schools, playgrounds and construction zones.

4. Steering

This includes general steering control, steering-wheel position and weight transfer. Your steering should be smooth, controlled and appropriate for the situation.

5. Communication

Signals, timing and cancelling the signal are included in this category. Clear communication allows other road users to understand what you intend to do.

A Pass Can Still Include Areas to Improve

Passing the road test does not mean that every part of the drive was perfect. An examiner may still identify habits that should be improved.

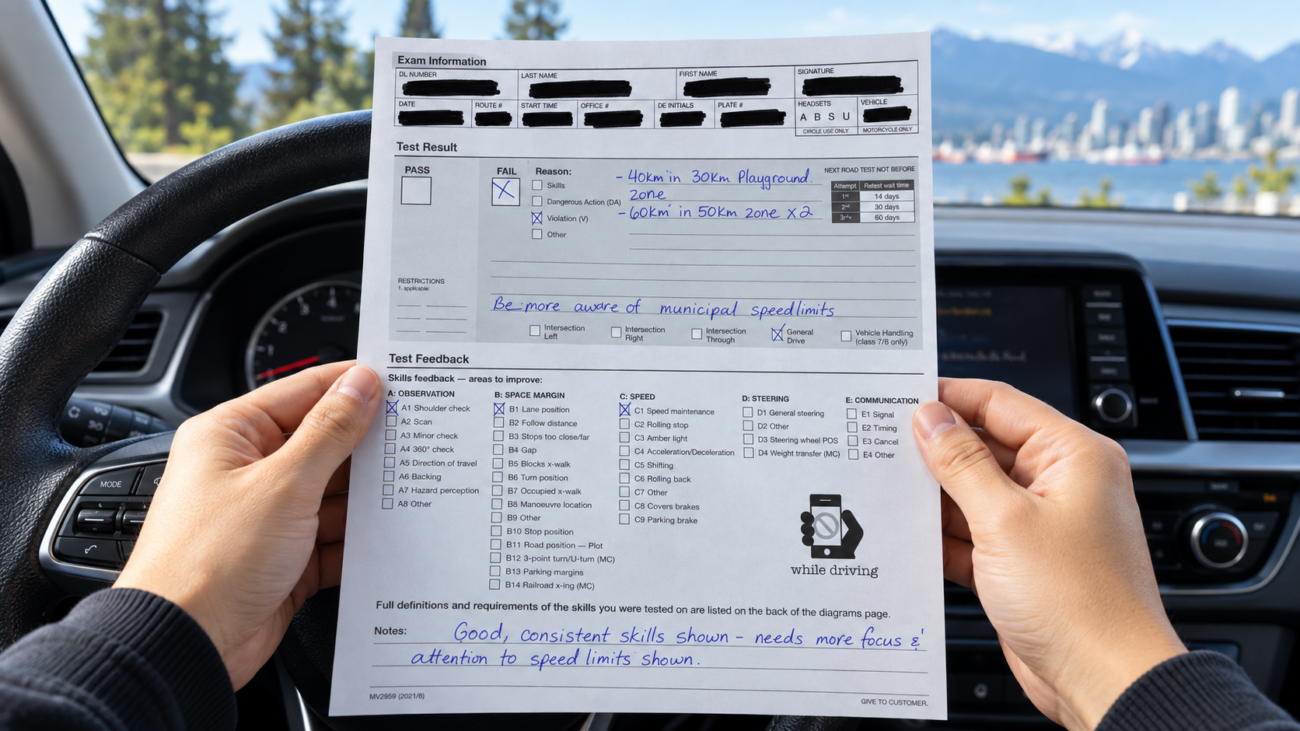
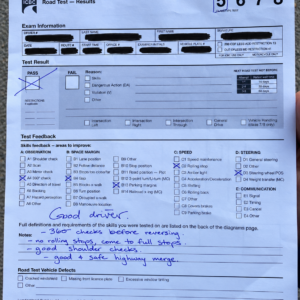
For example, one successful result sheet included positive comments such as “good driver,” good shoulder checks and a good, safe highway merge. However, the same driver was also reminded to complete a 360-degree check before reversing, avoid rolling stops, choose safer gaps and improve parking margins.

This is normal. A passing result means the driver demonstrated the required level of safety and control during the test, but the feedback should still be taken seriously. Passing is great; safe driving is better.
Why Did I Fail If I Made Only a Few Mistakes?

Many drivers are surprised when they fail despite receiving only a few marks. However, a road test is not decided simply by counting the number of checked boxes.

The seriousness of an error matters. A dangerous action, a traffic violation or a situation that requires the examiner to intervene may lead to an unsuccessful result, even when the rest of the drive is reasonably good. Repeating the same mistake can also show that a skill is not yet consistent.

Instead of focusing only on how many marks you received, consider what happened, how serious it was and whether the same error occurred more than once.

A Real Example: Good Driving, One Serious Violation

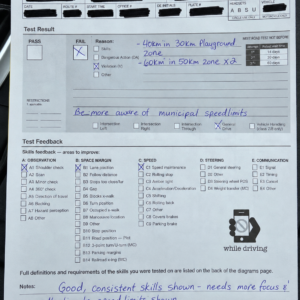
One of the unsuccessful result sheets shown in this article offers a useful example. The examiner wrote that the driver demonstrated “good, consistent skills,” but also noted that the driver needed more focus and attention regarding posted speed limits.

According to the examiner’s notes, the driver travelled at 40 km/h in a 30 km/h playground zone and failed to recognize a 50 km/h zone more than once. Although many other parts of the drive were completed well, the speed-limit violation affected the final result.

This example shows why knowing the posted speed limit is not enough. Drivers must continually scan for signs and adjust their speed as soon as the limit changes. Extra attention is especially important around schools, playgrounds, construction areas and neighbourhood streets.
What Should You Do After the Test?

Whether you passed or failed, take a few minutes to review the result sheet carefully. Do not focus only on the final result. Look at the checked boxes, read the examiner’s handwritten notes and identify any mistakes that occurred more than once.

If you passed, continue practising the areas mentioned by the examiner. Passing the test is an important achievement, but safe driving requires continued attention and experience.

If you were unsuccessful, use the feedback to create a focused practice plan. Instead of repeating the entire road test route, spend more time correcting the specific habits identified by the examiner. For example, if the sheet mentions shoulder checks, speed control or parking margins, practise those skills until they become consistent.

When Can You Retake the Road Test?

ICBC currently requires the following minimum waiting periods:

  • After the first unsuccessful road test: 14 days
  • After the second unsuccessful road test: 30 days
  • After the third or any later unsuccessful attempt: 60 days

These are minimum waiting periods. The next available appointment may be later, depending on booking availability.

Use the waiting period wisely. Practising without understanding what went wrong may reinforce the same habits. A professional instructor can review your result sheet, observe your driving and help you work on the areas that need the most attention.

Important Change Beginning October 19, 2026

Beginning October 19, 2026, British Columbia’s Graduated Licensing Program will change. New drivers will still need to pass the Class 7 road test to move from the Learner stage to the Novice stage.

However, the second road test currently used to move from a Class 7 Novice licence toward a Class 5 licence will be removed. Eligible drivers will instead complete a Driving Record Assessment. After meeting the requirements, they can upgrade to a Class 5 licence with restrictions, including a 12-month requirement for zero blood-alcohol and zero blood-drug content while driving.

These changes do not make safe driving skills less important. Your driving record, daily habits and ability to make safe decisions will continue to matter throughout the licensing process.

Turn Your Results into a Training Plan

An ICBC result sheet is most helpful when it becomes a practical training plan. At Urban Driving Academy, we can review your road test feedback and design lessons around the specific skills that need improvement.

Whether you need help with observation, speed control, parking, highway driving, confidence or preparation for another road test, focused practice can help you avoid repeating the same mistakes.

Bring your result sheet to your next lesson, and we will help you understand the feedback and turn it into safer, more confident driving.

Urban Driving Academy
North Vancouver
Phone: 778-999-9605
Website: urbandrivingacademy.com

Drive Smart. Pass with Confidence.
ERA PHOTO

Enhanced Road Assessment (ERA): What to Expect and How to Prepare


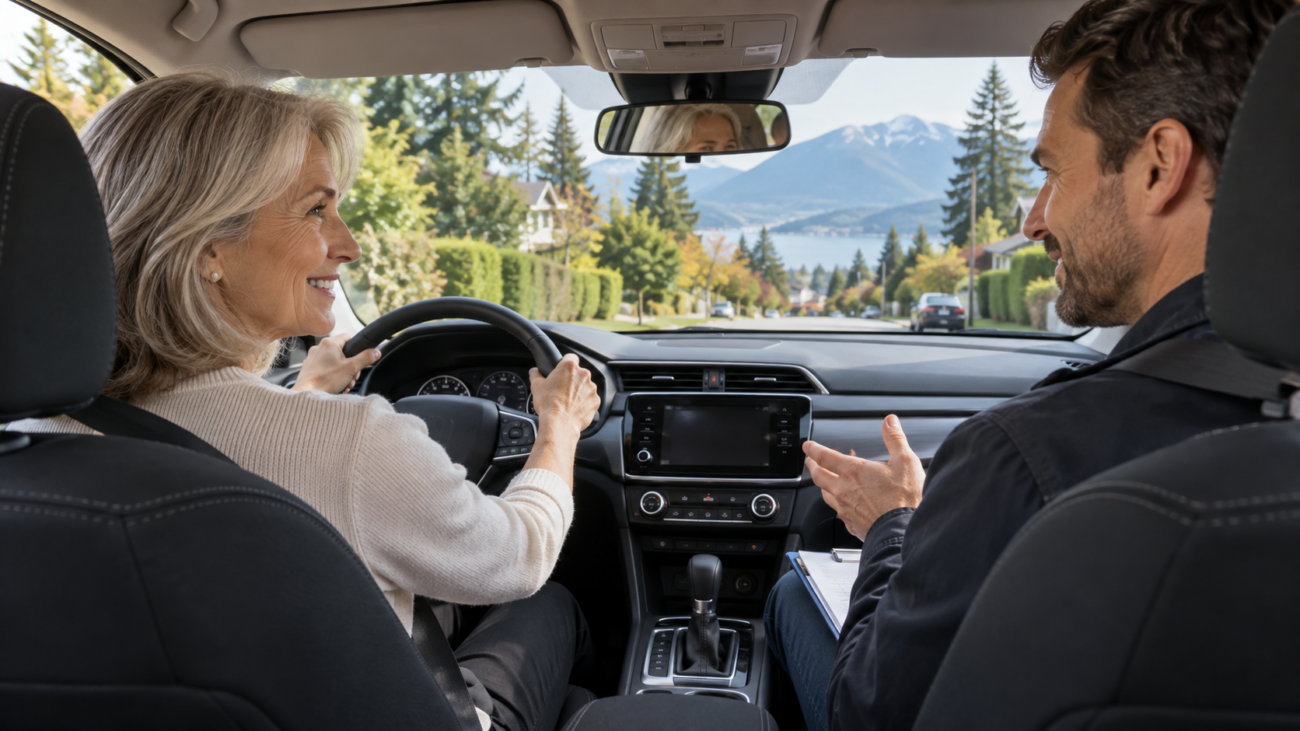
Receiving a letter requiring an Enhanced Road Assessment can feel unsettling, especially if you have been driving for many years. Knowing what to expect and practising beforehand can help you approach the assessment with greater confidence and peace of mind.

Who may be referred for an ERA?

An ERA is an on-road driving assessment conducted by ICBC for RoadSafetyBC. Drivers with a Class 5 or Class 7 licence may be referred at any age. A report from a medical professional, a collision or police report, or the results of an earlier assessment may lead RoadSafetyBC to request further evaluation. If an ERA is required, the driver receives a referral letter.

Turning 80 does not automatically mean you must take an ERA. In British Columbia, drivers must submit a Driver’s Medical Examination Report at age 80, again at 85, and every two years thereafter. If RoadSafetyBC needs further information after reviewing the report, it may refer the driver to ICBC for an ERA.

What happens on assessment day?

Allow approximately 90 minutes for the full appointment. The on-road driving portion takes about 45 minutes. Before you drive, the examiner checks the vehicle and asks you to demonstrate how to use certain safety controls. After the first part of the drive, you return to the ICBC centre and receive feedback on your driving. You then head out for the second part of the assessment. At the end, the examiner reviews your performance with you.

While driving, you may be asked to operate a vehicle control, such as the windshield wipers, headlights or defroster. You may also be asked to follow a three-step set of driving directions and retrace a short route. These are practical tasks completed during the drive; there is no computer-based memory test.

What driving tasks are included?

According to the official Enhanced Road Assessment Policy, the on-road assessment includes at least:

Driving task Minimum number
Right turns 10
Left turns 10
Stops 4
Driving straight through intersections 8
Lane changes 6
Changes in speed zone, such as school or playground zones 2
Parking manoeuvres 2

The policy also includes:

Task What it involves
Operating a vehicle control Using a control identified before the drive, such as the wipers or defroster, while driving
Following multi-step directions Carrying out a three-step driving instruction
Retracing a route Driving away from a starting point and finding the same route back
Receiving feedback Hearing the examiner’s feedback partway through the assessment and continuing the drive

These are minimum requirements, not a fixed route to memorize. Highway driving is not a required part of the ERA, although it may be included depending on the location.

How can Urban Driving Academy help?

We offer private ERA preparation lessons tailored to your needs. We begin by reviewing your driving and identifying the skills you would benefit from practising, such as observation, turns, intersections, lane changes and speed control.

We also help you become familiar with the assessment process. Together, we can practise using vehicle controls, following multi-step directions and responding to feedback. Most importantly, we help you feel calm and confident behind the wheel so you can demonstrate your driving ability.

Drivers with Class 1 to 4 licences may also be referred for a driving re-exam. These appointments are not offered at every ICBC location, so confirm your assessment location with ICBC when booking.

Received an ERA or re-exam referral letter? Contact Urban Driving Academy to arrange preparation suited to your needs.

sea to sky

Winter Driving and Road Tests in British Columbia: What to Check Before You Go


Winter in British Columbia does not always begin with heavy snow. It may be raining where you live while the road ahead has colder, more difficult conditions. Before you drive, check both your route and your vehicle.

When are winter tires required?

Starting October 1, winter tires are required on certain signed highways in British Columbia. The requirement does not apply to every city street, and the end date varies by route.

The Sea to Sky Highway toward Squamish is one example. Its mandatory winter tire zone begins just north of Horseshoe Bay. According to the Squamish RCMP, the requirement there runs from October 1 to March 31. Before travelling elsewhere, check the posted signs and the province’s map of designated routes.

Under B.C.’s rules, a winter tire does not necessarily need the mountain and snowflake symbol. A tire marked M+S (Mud and Snow) also meets the legal definition if it has at least 3.5 mm of tread depth. If you regularly drive in snow and ice, however, ICBC recommends tires with the mountain and snowflake symbol for better traction in more demanding conditions.

What tires do you need for a road test?

In our experience, a road test vehicle does not usually need tires with the mountain and snowflake symbol. An all-season tire marked M+S may be accepted, provided the tires are in safe condition and suitable for the conditions that day. ICBC can refuse a vehicle with unsafe tires, and the final decision about whether a vehicle is acceptable for a road test rests with ICBC.

Do not assume a road test will automatically go ahead or be cancelled when it snows. Our instructors have seen some Class 7 tests cancelled on snowy days, while some Class 5 and Class 4 tests went ahead after road conditions were assessed. This is our experience, not a fixed rule for each licence class. If the weather is poor, confirm the status of your appointment with ICBC before leaving.

Walk around your vehicle before driving

A quick walk around the vehicle is a useful habit before any trip. Look at the visible condition of the tires, check for obstacles or damage, and notice any new scratches. In winter, clear snow and ice from the windows, mirrors and lights so you can see clearly and other road users can see you.

Check that your vehicle insurance is current, especially if you plan to use your own vehicle for a road test. ICBC requires a safe, insured vehicle and may refuse one with unsafe tires, faulty lights or windows that do not meet its requirements. You can review ICBC’s road test vehicle checklist before your appointment.

We also recommend checking your vehicle’s fluid levels once a week, following the owner’s manual. Keep an eye on the windshield washer fluid in winter. Check tire pressure regularly too, as it can drop when temperatures fall.

Adjust your driving to the conditions

On wet, snowy or slippery roads, slow down and leave more room to stop. Accelerate, steer and brake smoothly. Before a trip, check the road conditions and highway cameras on DriveBC. If the conditions are beyond what you or your vehicle are prepared for, consider travelling at another time.

A few minutes of preparation can make a difference: check the route, walk around the vehicle, inspect the tires and confirm your insurance before you set off. If you have a road test, confirm that it is going ahead in the day’s conditions.

blog

Learn to Drive with Confidence: Safe Habits for Life and Road Test Preparation

Learn to Drive with Confidence: Safe Habits for Life and Road Test Preparation

Passing a road test is an important milestone. It matters to our students, and it matters to us. But a licence alone does not make someone a confident, capable driver. The habits you build while learning will stay with you long after the test is over.

At Urban Driving Academy, our goal is to help you drive safely, protect yourself and others, and enjoy the freedom of being on the road.

Lessons That Make Sense to You

People learn at different speeds and come to us with different experiences. Some are getting behind the wheel for the first time; others have driven for years but want to feel more confident. We start by understanding what you already know, then focus each lesson on the skills you need most.

Our instructors break difficult tasks into clear, manageable steps. We use practical explanations and easy-to-recognize reference points to help you understand where to position the car and how to judge your surroundings. As your confidence grows, you learn to make those decisions for yourself in different driving situations.

We want lessons to feel calm, encouraging and enjoyable. You should be able to ask questions, make mistakes and learn from them without feeling rushed. We also respect your time and work to help you progress in as few lessons as your needs and readiness allow.

Build Habits You Can Rely On

Good driving is made up of small decisions repeated consistently: observing what is happening around you, managing your speed, leaving enough space, communicating your intentions and responding calmly when conditions change.

We practise these habits throughout your lessons so they become part of the way you drive. The aim is to help you feel prepared when you are driving on your own, with passengers, and in places you have never been before.

Prepare for Your Road Test

We know how much passing on the first attempt means to many of our students. We take that goal seriously. Your instructor will help you identify what needs work, practise the skills assessed on the road test and understand how to approach test day with greater confidence.

We are proud of our students’ results. They reflect the care we put into teaching and the effort our students put into learning. Our focus remains the same before and after the test: helping you become a safe driver who can make sound decisions for years to come.

Whether you are learning to drive or returning to the road, Urban Driving Academy offers lessons tailored to your needs in North Vancouver, Vancouver and Burnaby. Contact us to get started.

safe

One Hour, 90 Minutes, or Two Hours: How Long Should Your Driving Lesson Be?


When booking a driving lesson, it is easy to assume that a longer lesson means more learning. Our instructors at Urban Driving Academy have found that the best lesson length depends on how each student settles in, learns, and maintains focus.

When 90 minutes works best

Some students need time to get comfortable with the car, the road, and the rhythm of driving. It may take 30 to 40 minutes before they feel ready to focus on a new skill. In a one-hour lesson, that leaves little time to practise it.

A 90-minute lesson gives these students time to settle in, work on the skill, and receive feedback before the session ends.

When one hour is enough

Other students are focused and ready to go from the start. They make quick progress, but after 30 or 40 minutes, their energy may drop and mistakes begin to appear. They may think their driving is getting worse when they are simply tired.

For these students, a one-hour lesson can work better. It lets them finish while they are still engaged and leave with a clear sense of what they achieved.

When we recommend two hours

If a student needs pickup and drop-off some distance from the practice area, travel can take up a meaningful part of the lesson. A two-hour session may make sense, especially for someone who also needs time to settle into driving. It allows time to reach a suitable practice area, work on the planned skill, and return.

A two-hour booking does not have to mean two hours of driving without a pause. The instructor can adjust the pace and include a break when needed.

Making room for breaks and feedback

Some students, including those who experience anxiety, have a history of distressing driving experiences, or are autistic, may find shorter periods of driving and regular breaks more helpful. We encourage our instructors to respond to the individual student. For example, a short break after about 20 minutes may give someone time to reset.

When it suits the student and it is safe to do so, the instructor can stop and discuss feedback outside the car. This gives the student space to listen, ask questions, and prepare for the next part of the lesson without having to process everything while driving.

The first lesson helps us understand what works for you. We pay attention to how long you need to settle in, when your focus is strongest, whether breaks help, and how much time pickup and drop-off require. From there, we can recommend a lesson length that makes your practice time more useful.